How to remove white background in Paint 3D | Microsoft Paint
Removing a white background in Paint 3D can be an easy fix if you have that application on your Windows 10 computer. The transparent background of any image appears more powerful as there is no background to distract attention. A transparent image can be added on top of any larger image to blend them perfectly. Also, any color can be used as the background since it is transparent by default. That is why making the background of an image transparent makes sense. But removing background from a photo used to mean firing up Photoshop or any other 3rd party software and then playing around with masks, selections, and all kinds of tools with a steep learning curve.
But how can we do it without installing any third-party software on the Windows system? That’s where Microsoft’s Paint 3D which is the updated version of our beloved Paint comes into play. Removing a background from an image in MS Paint 3D relies on advanced machine learning techniques that make an educated guess, and do most of the hard work for you.
To remove any existing background by selecting the object. The background can be of any color i.e. white, red, pink, black, etc., or it can be any pattern. Then, transparency needs to be added followed by saving the image with transparency.
To remove any background from an image with MS Paint 3D you have to :
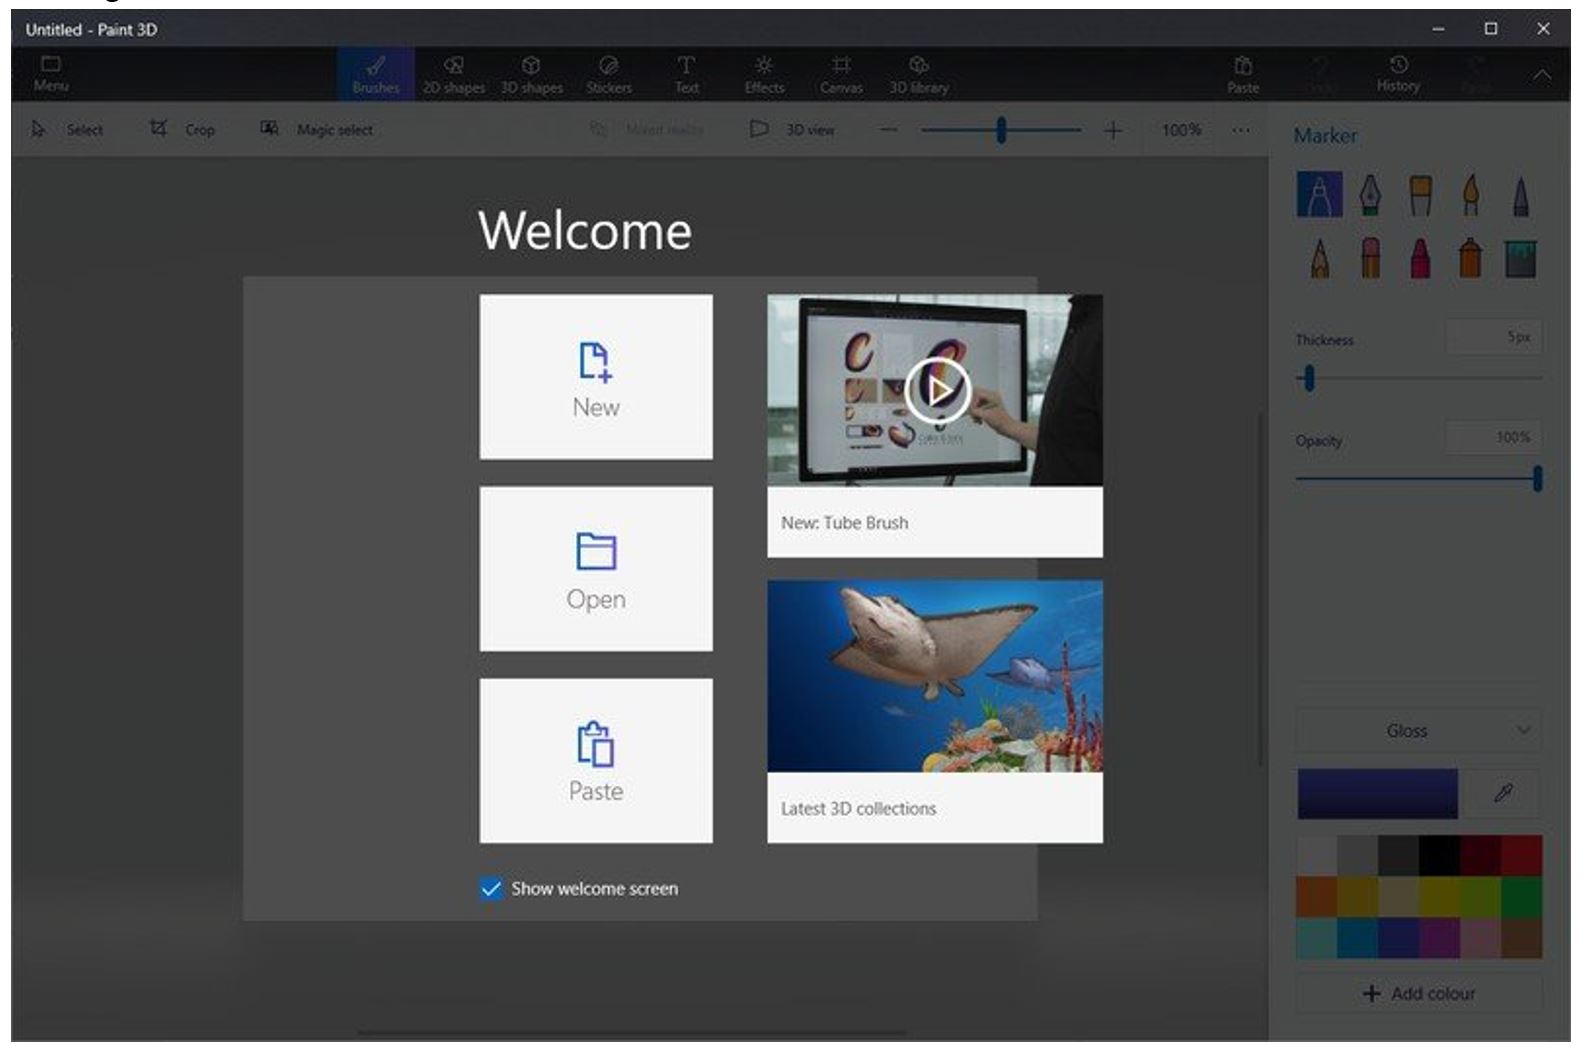
- To open MS Paint 3D press the Windows button from your keyboard and type “Paint 3D” into the Start Menu.
- Select the image to get edited, by selecting the “Open” option and then browse to the folder where the files are stored from the Welcome Screen. Use the File Browser to find the correct file you want to edit. Alternatively, you can go to the folder where the file is and right-click on the file, and then select edit with Paint 3D.
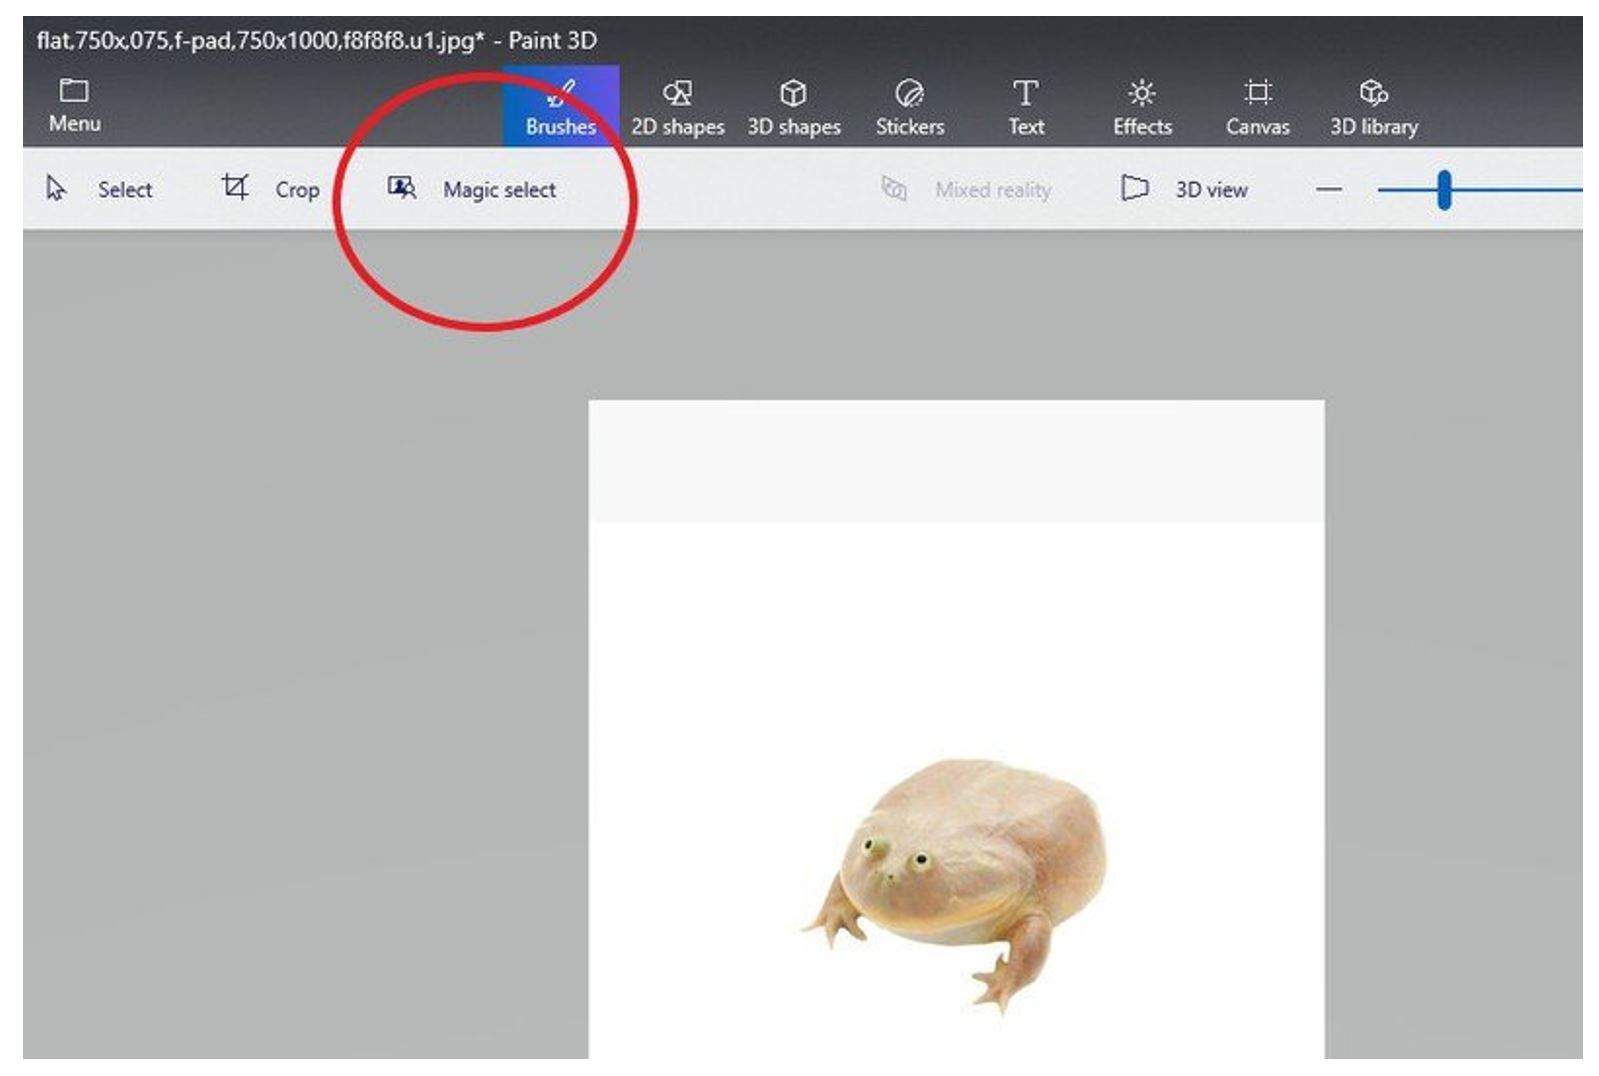
- Click on the “Magic Select” tool from the top menu.
- Paint 3D will automatically start the process of guiding you through. Crop the image as below to remove any unwanted areas within the picture.
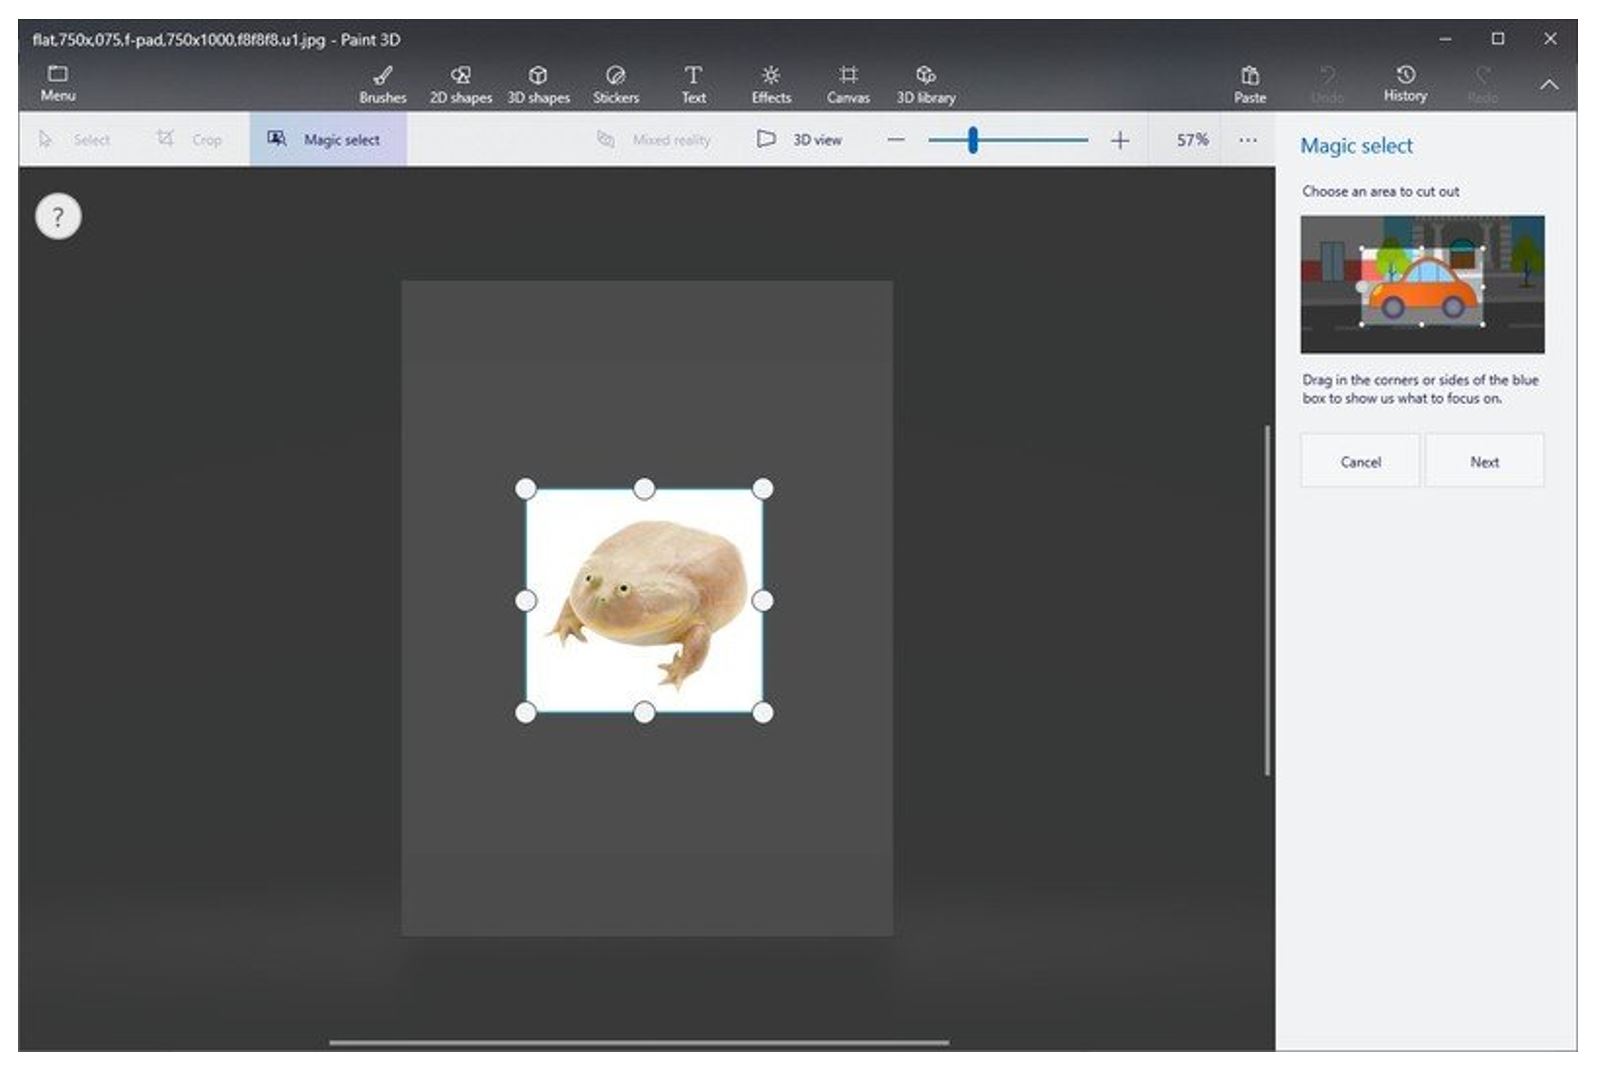
- Hit the “Next” button from the right-hand side option bar.
- A green edge will appear around the picture where Microsoft Paint 3D thinks you want to be cut out.
- Zoom in with the mouse scroll wheel, add or Remove any additional parts of the picture using the tools on the right-hand sidebar.
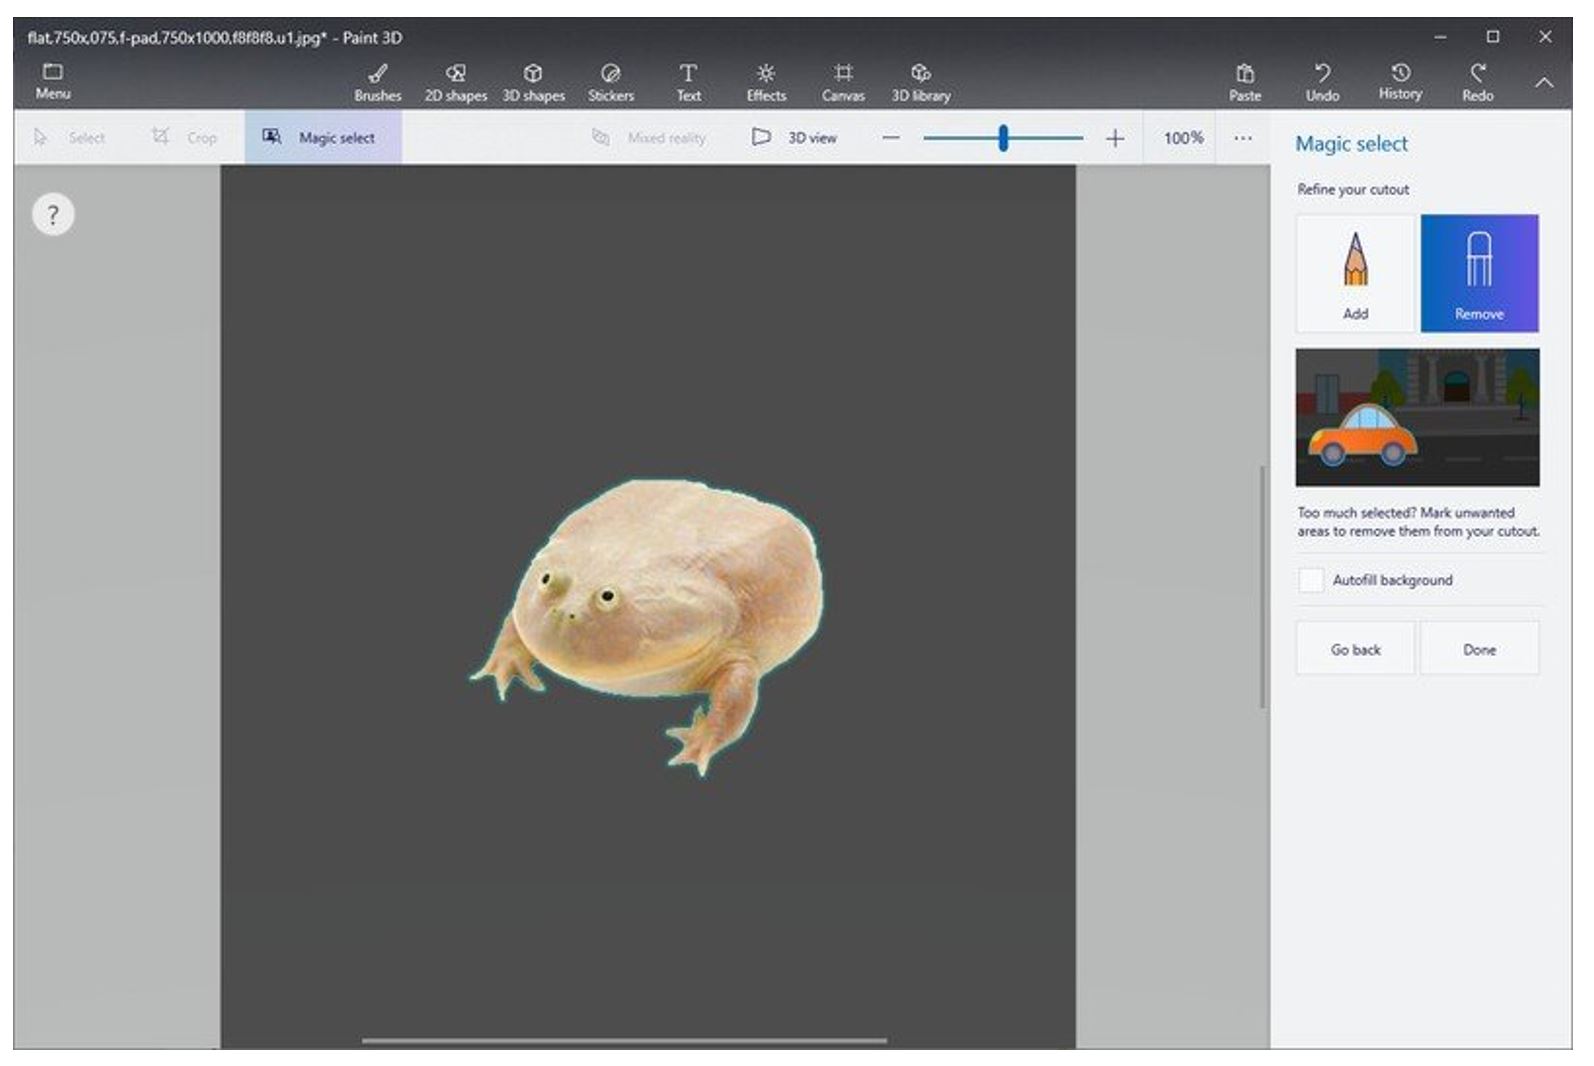
- Once all of the required modifications are made, hit Done, the image cut-out will appear as a separate object which can move around.
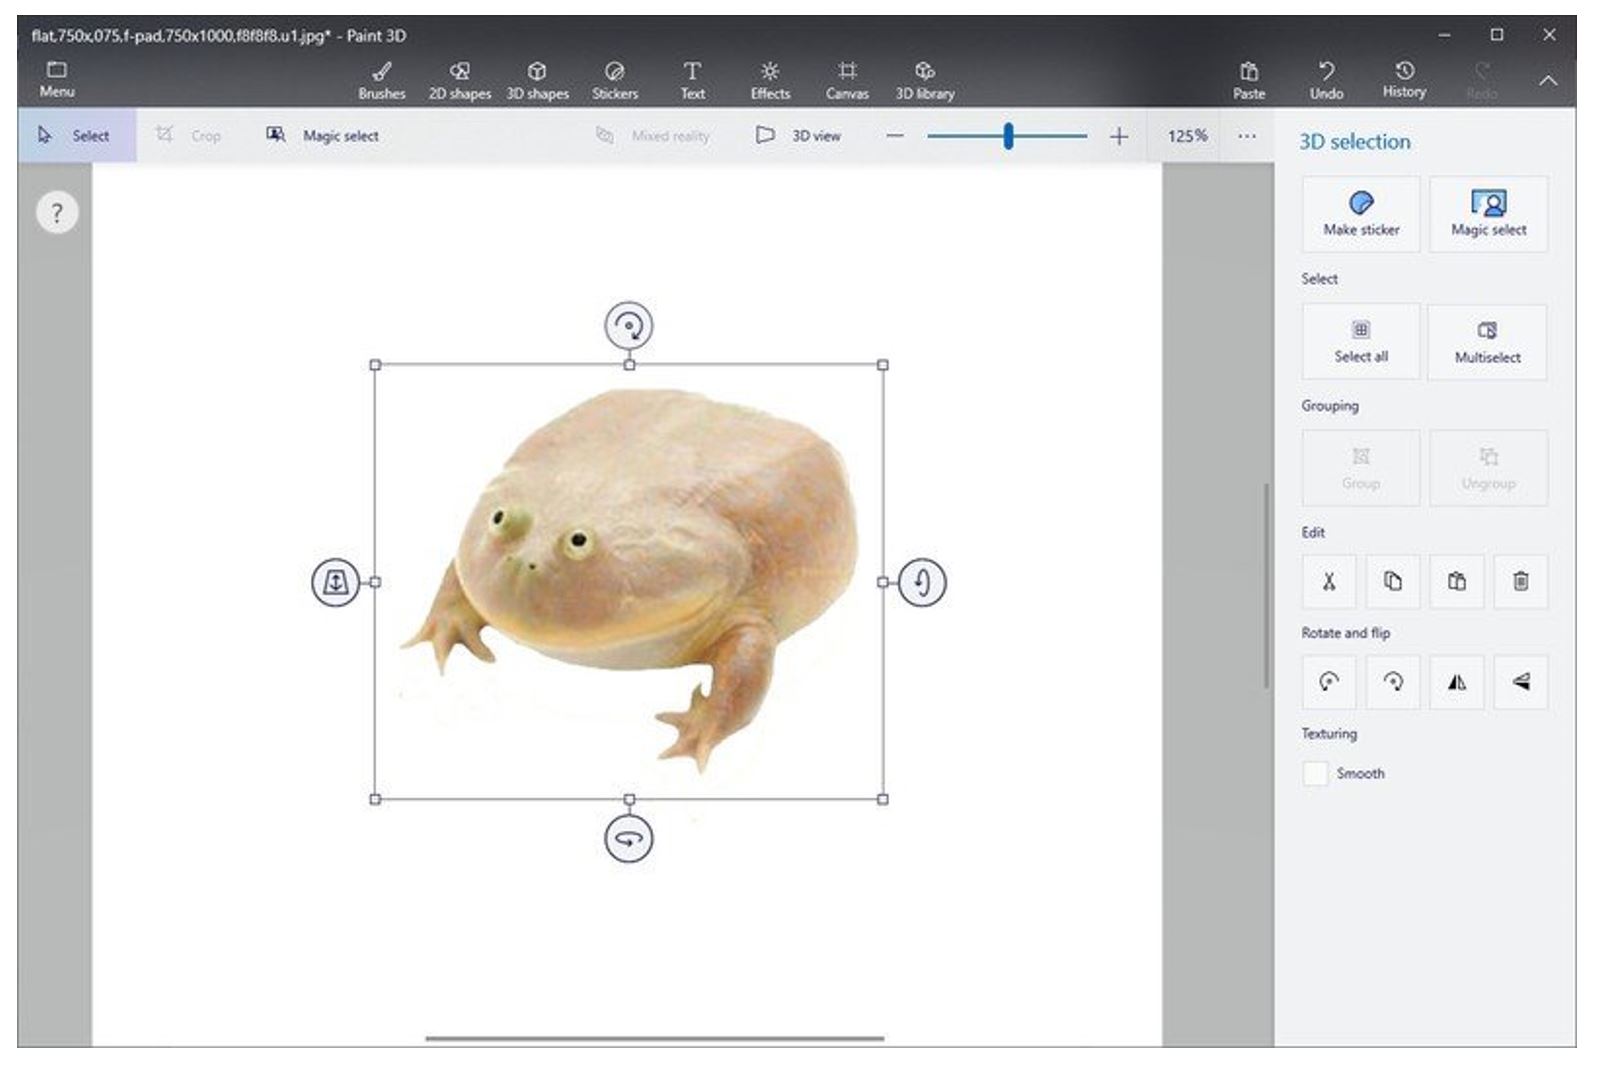
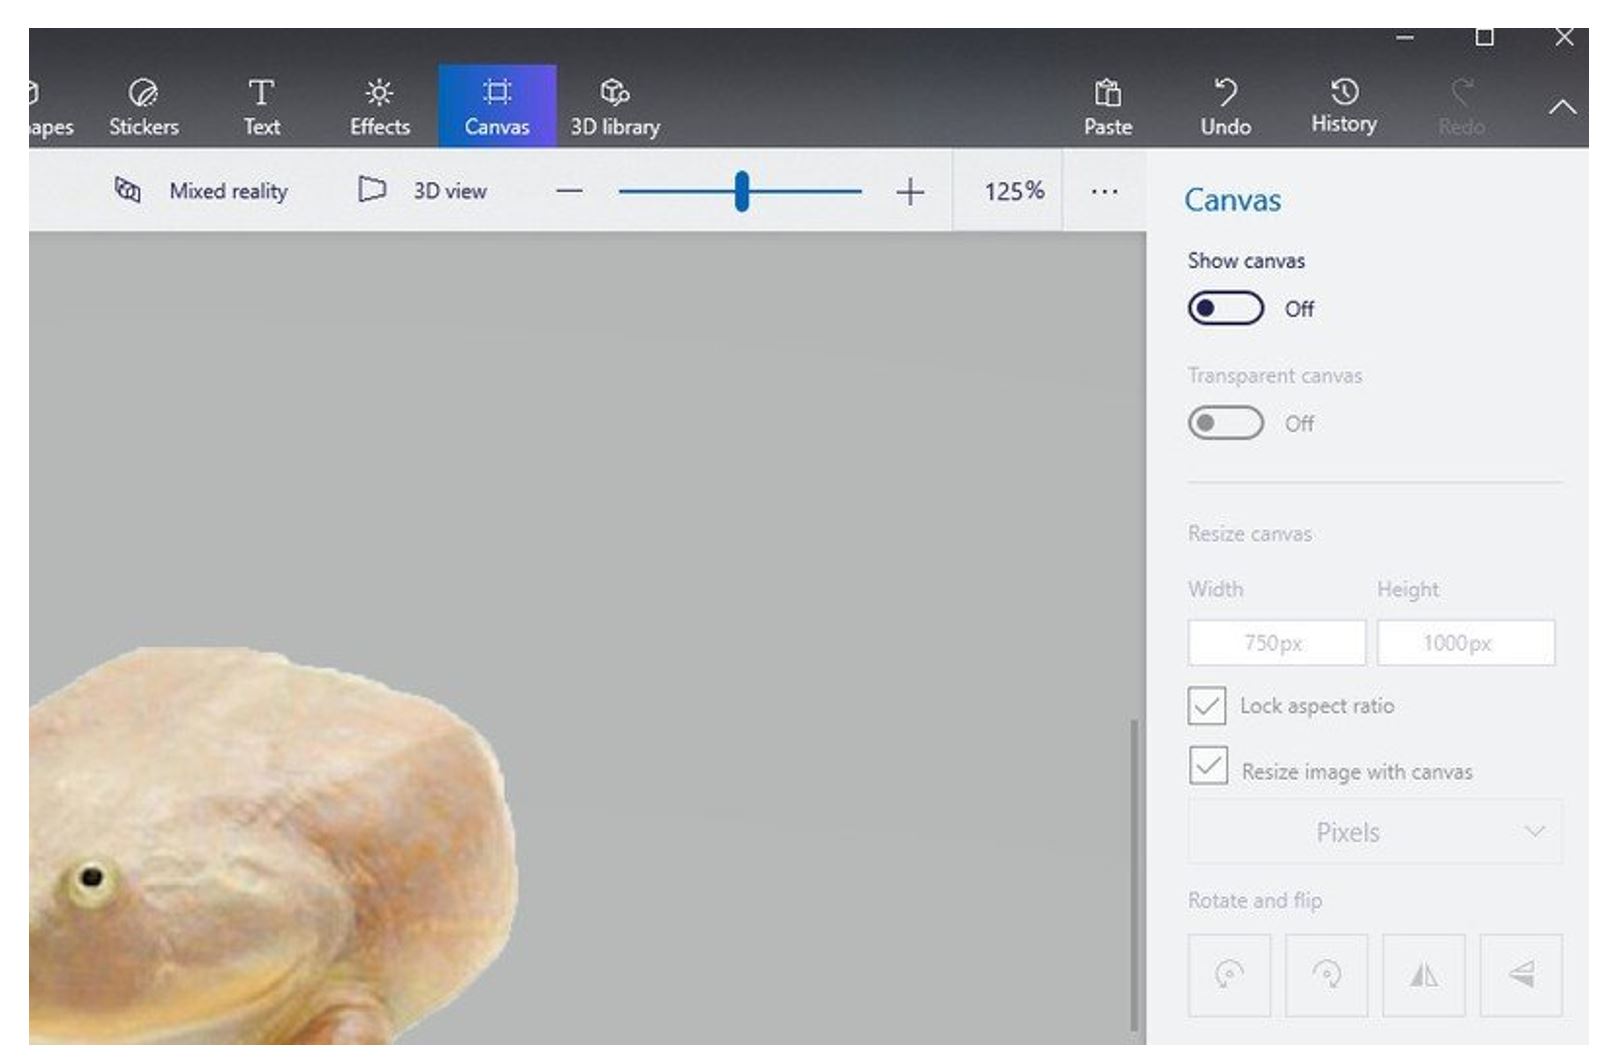
- To remove any canvas background from the image. Select the Canvas option from the top menu bar and select the Show Canvas toggle to hide it. This will turn the background grey.
- To save the picture with a transparent background in paint, Go to the top left-hand corner in the Menu bar and hit Save.
- Select PNG as your image type, since this is an image format that can detect transparency much easily. Also, check the “Transparency” check box as shown.
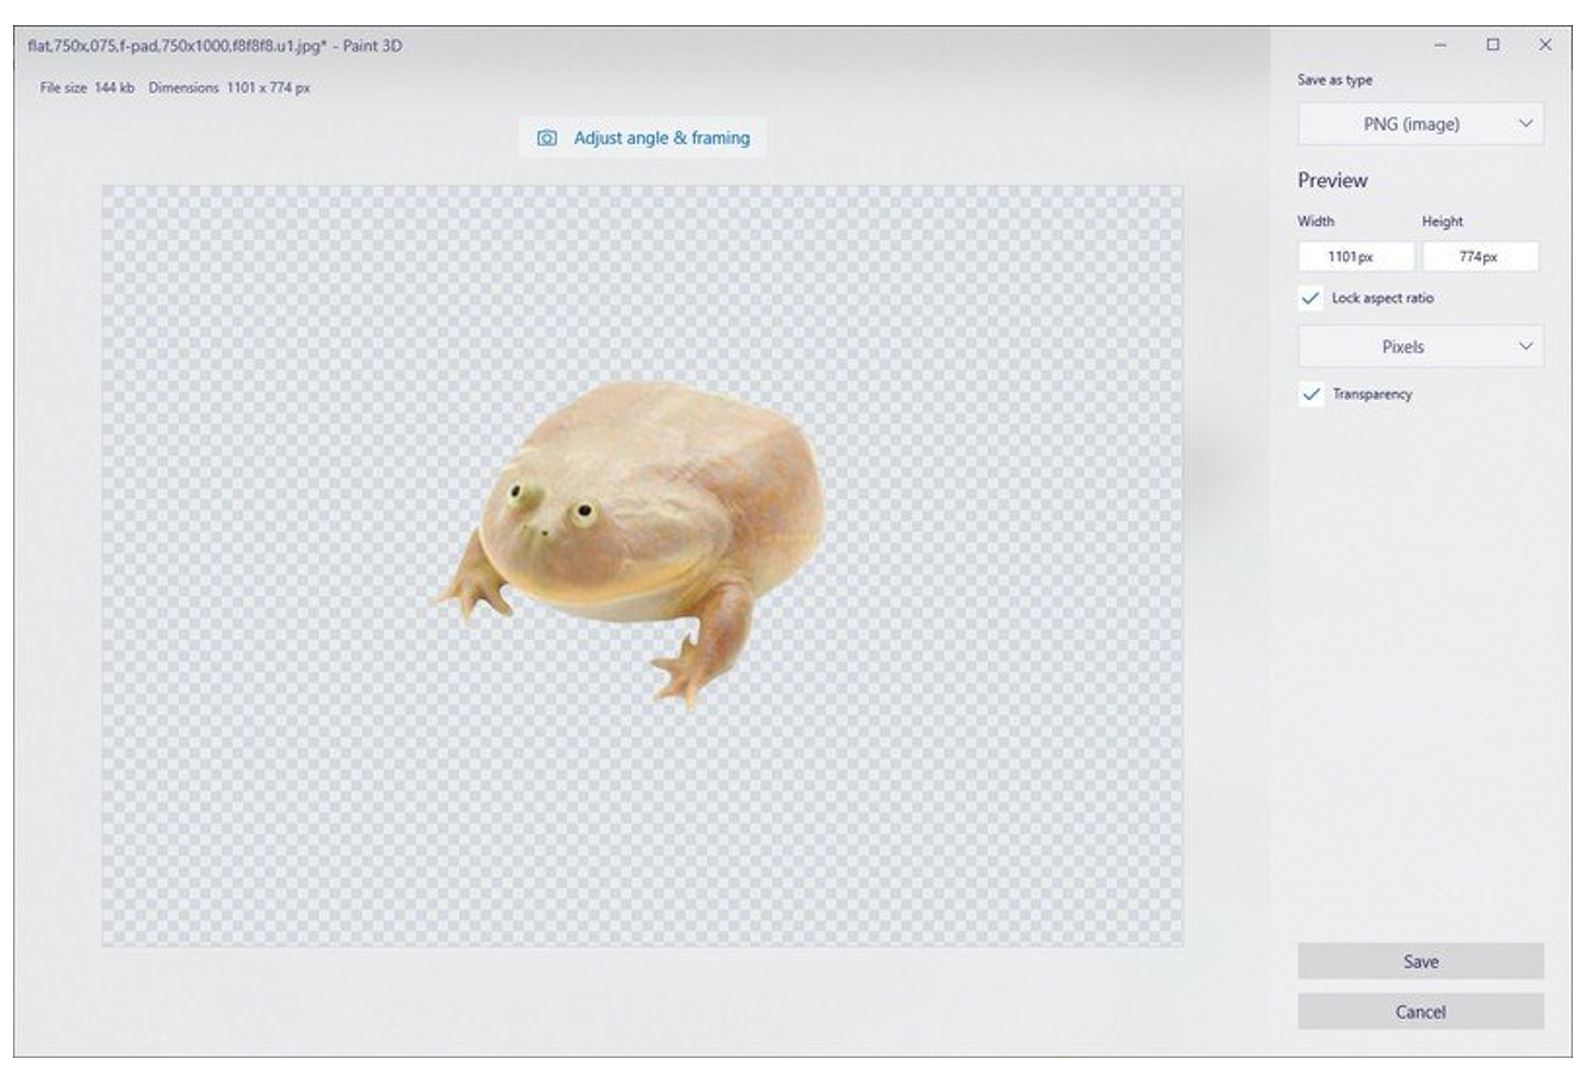
- To remove any additional space from the picture, select the “Adjust angle & Framing” option from the top of the application.
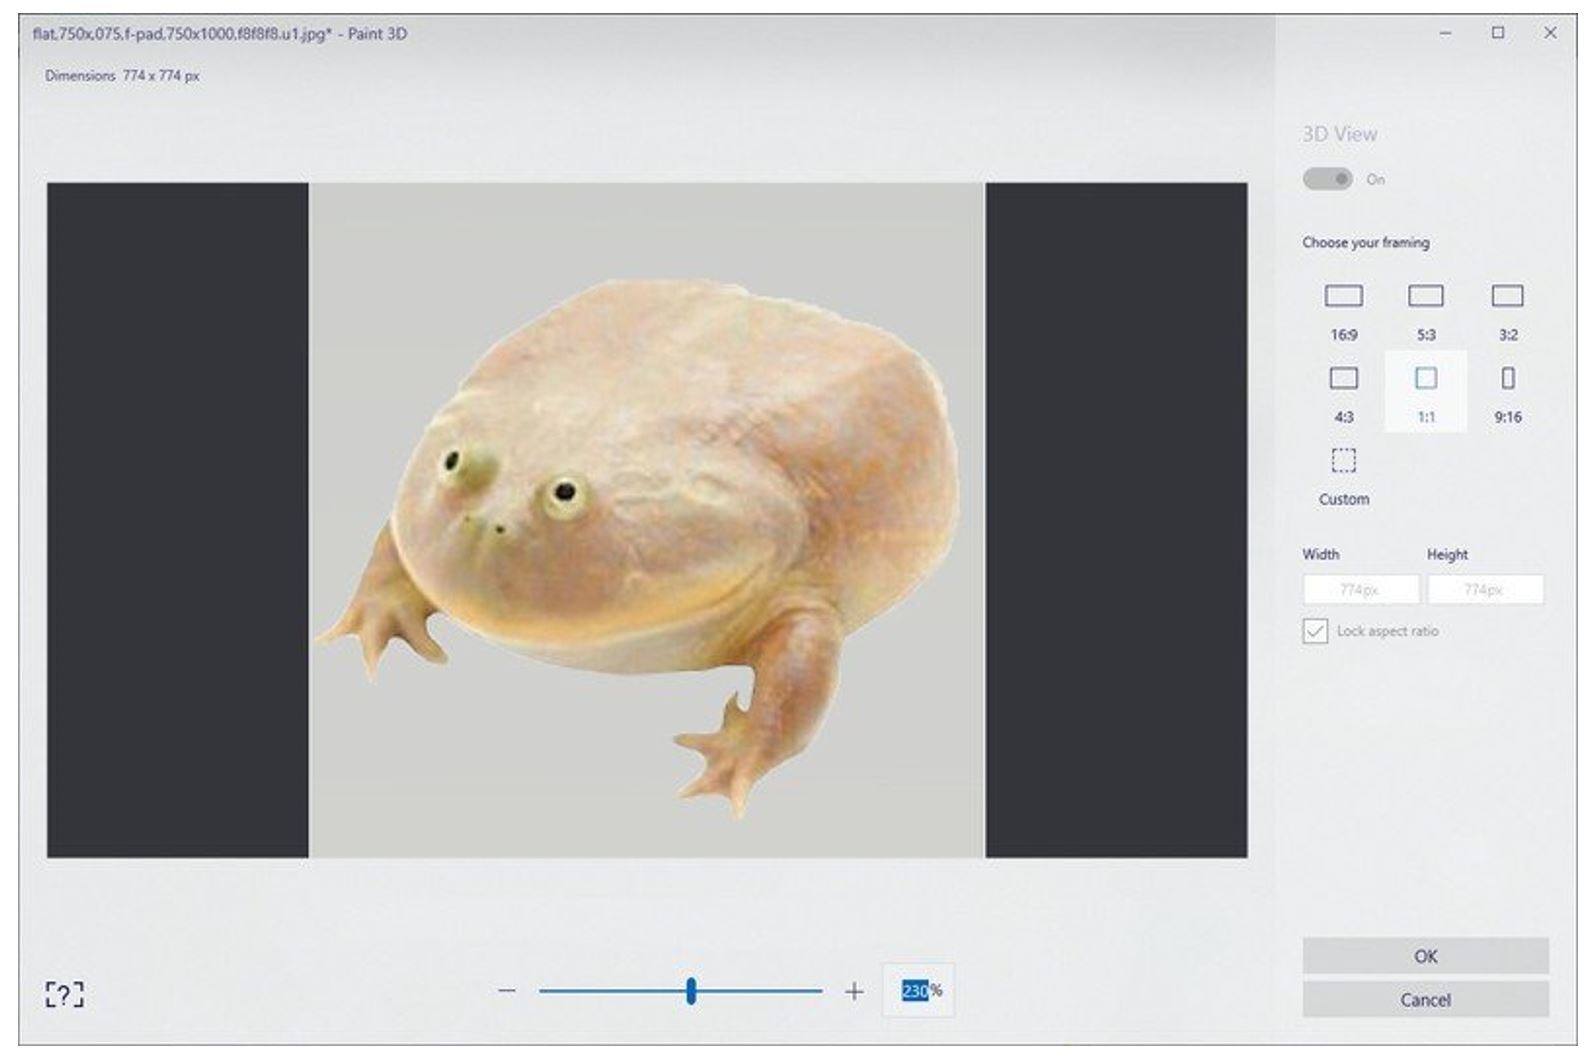
- Also select the size ratio of the image, zoom, and reposition the image to frame it as per requirements.
- Click the “OK” button from the bottom right-hand corner to return to the “Save” screen, then click on the “Save” button to select a location to save the image.


Comments are closed.