Is not it true if you lose your Internet connection? However, we’ve looked at all of this. And one of the most common error messages we receive is ERR_NAME_RESOLUTION_FAILED.
If you use the Chrome Internet Browser on a Windows 10 computer, this error message may appear when you try to access any number of websites.
The good news is that this error can be solved!
If you are experiencing Pro code errors due to an error at this time or if you are looking for more information about this error, you are in the right place.
In this article, I will give you all the information you need to understand this error and fix it most efficiently.
Of course, there is plenty of information about this Internet error, but his research may be a bit painful in the neck.
So we researched everything, so you do not have to do it. This article contains everything you need to read this error for any purpose.
Obviously, our main goal is to show you how to fix this error more effectively.
So I’m going to look at various methods to fix this mistake once and for all. It has been shown that each method works in this manual.
You may be relieved to learn that there are several ways to fix this error, but it is very unlikely that you have to check it before you solve it.
It is likely that you will soon find the right method for you. For this reason, we firmly suggest that you follow all the different methods in the same way as described in this guide.
Having said all this, it’s a good idea to carefully read the manual before proceeding and try to fix it.
Why; This is a good way to understand what the methods to eliminate this error before you start. Since each of the methods in this guide solves a different problem that could be the basis of this error.
It can also be a good way to start with a specific method if you have serious reasons to believe the method is a problem.
Table of Contents
What is this err_name_resolution_failed error?
Before examining the various ways to fix this error, you need to make sure we are all on the same page.
This is because you really need to make sure you are referring to the error that this article refers to.
The last thing someone needs when it comes to troublesome computer errors is a waste of time on something that does not solve the mistake.
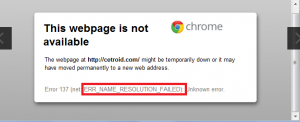
You will recognize this error if you receive the following error message:
“This site is unavailable: the site on [modified] may be temporarily inactive or permanently transferred to a new web address.” Error code: ERR_NAME_RESOLUTION_FAILED [sometimes error code 137]. “
This error message only appears if you use Chrome browser to access almost all sites. Even if you get this error, you can access other websites.
It’s still incredibly disappointing if you can not access the site you need to access at any time.
There are three simple and simple ways to fix this error: Anyone, regardless of the computer experience, should be able to solve it simply by following the steps outlined later in this article.
However, before we look at these different methods, it should be stressed that this error will be corrected quickly.
If you are using a Windows 10 computer, you will also have access to the Internet Explorer (IE) browser. Therefore, you can also quickly launch IE and verify that access to the site is blocked using Google Chrome.
If you have previously installed an alternative web browser, such as Mozilla Firefox, you can try it as an alternative.
Now I know that using another Internet browser is not perfect. But, remember that this fix is not a solution to this error, but just an alternative so you can access your site without delay before trying to fix the error.
In any case, you should always fix this error if you want to continue using the Google Chrome browser.
“Google is my best friend and my worst enemy, it’s great for research, but then I’m late, I’ll have a character eating orange and then look for oranges, I’ll go to the conversation, oranges will learn the story from orange. “
After solving all these problems, we can now analyze all the different methods to solve this particular Google error.
# Possible solutions 1
The first possible solution is to restart Netsh Winsock.
Do not worry if you do not know how to do it. Here are some simple steps:
- Take your computer
- At the same time, press the two following keys: the Windows key and the X key. This action displays a menu on the screen.
- Select a command line from all options.
- When prompted to confirm your intention to make changes, click Yes and continue. This confirmation displays a command line window on the screen.
- At the command prompt, type the following command: “ipconfig / release” [and without printing] Type.
- At the command prompt, type the following command: ipconfig / all and press Enter.
- In the command prompt window, type the following command: “ipconfig / flushdns” [not printing] Enter.
- At the command prompt, type the following command: ipconfig / renew and press Enter.
- Then at the command prompt, type the following command: “netsh in dns set dns” and press Enter.
- At the command prompt, type the following command: “netsh winsock reset” and press Enter.
- Finally, restart your computer.
After restarting your computer, you need to start your Chrome browser. So try visiting a previously blocked site because of this error.
If you have accurately typed all previous commands (for example, there is no typing error and in the order in which they are displayed), you must clear the error.
However, if you are sure you have done it correctly and the problem persists, you should proceed to the next method.
#Solution Number 2
The next way to resolve this error is to change your computer’s DNS address to Google’s DNS addresses (you can also go back to DNS by removing the changes).
If you do not know how to change your Google DNS address or are not sure, do not worry, the process is really very simple and here is:
- Take your computer
- Find the network connection in the bottom right corner and right-click on it.
- Then choose the “Open Network and Sharing Center” option and wait until it appears in a new window.
- In the Network and Sharing Center, on the left side of the window, click “Change Adapter Settings.”
- Then right-click on the Internet connection and select “Properties” for all options.
- When you are in the properties, you must select Internet Protocol version 4 (TCP / IPv4) and click Properties.
- Therefore, it is necessary to replace your preferred DNS server with the following 8.8.8.8.
- Then, change the alternate DNS server to 8.8.4.4.
- Finally, click OK.
Restart Google Chrome to see if the error persists. If the problem persists, go to the next method.
Before doing this, you can repeat the same action, but this time, delete the Google DNS address (previously restored automatically). But it depends on you.
# Possible solution number 3
The last way is to restart Google Chrome. It would be best if you did the following:
- Take your computer
- Launch Google Chrome.
- Enter the following in the address bar: “chrome: // flags /” [without quotation marks].
- Press enter
- Locate the “Reset all by default” parameter (in the right pane) and select it.
- Finally, restart Google Chrome.
This should solve the problem once and for all.
If you have comments on ERR_NAME_RESOLUTION_FAILED, leave us a message in the comments section!
[…] are some tips and tricks to help you fix this type of Windows PC error code using a Windows Chrome browser: […]