 The agent.exe file is also known as the InstallShield Update Service Agent and is used to connect to the Internet to check for software updates for the following software applications:
Roxio, DragonNaturally Speaking, Corel Draw, Acronis, Articulate, and other programs that make use of the service FLEXnet Connect.
Agent.exe acts like the wuauclt.exe process (referred to as Windows Update). It checks for updates on the Internet and notifies the user regarding the update.
For the agent.exe file to collect the correct update for the software, it must obtain information from the software including product version, product name, and language.
By default, the provider of the software is the one that sets the frequency of the update-checking process carried out by the agent.exe file.
The user can also change its settings through the control panel of the Update Manager.[1]
The executable Agent can originate from a lot of different applications. Most of the time, the agent.exe will be traced back to InstallShield software.
Many software publishers use the InstallShield technology to create installations for their applications which often include an agent.exe process used to contact their own servers and install updates.
However, agent.exe is an extremely popular executable name and is used by many other software.
Even though the application that uses agent.exe might be different, the purpose is most likely the same – to facilitate the connection between a certain application and an external server.[2]
Table of Contents
Application Error agent.exe
 Many errors can occur in a computer system by different executable files, but they can also be resolved by different tools and techniques.
Following are the common error messages which can occur more often by agent.exe:
- Agent.exe Application Error.
- Agent.exe is not a valid Win32 application.
- Agent.exe has encountered a problem and needs to close. We are sorry for the inconvenience.
- Cannot find agent.exe.
- Agent.exe not found.
- Error starting program: agent.exe.
- Agent.exe is not running.
- Agent.exe failed.
- Faulting Application Path: agent.exe.[3]
High Disk Usage on agent.exe
Many users worry about the high disk usage by the agent.exe file in the background process, there are many ways to fix the problem, following are some of the fixes to fix the problem:
Fix 1: Disabling the service
- Press Windows + R to launch the Run application. Type “services.msc” in the dialogue box and press Enter. This will launch all the services present on your computer in front of you.
- Once in the services window, search through the list until you find Softthinks Agent Service. Double-click it to open its properties. Underneath the service status, click on “Stop”. This will stop the service from running immediately and cause the disk usage to return to normal.
- If you want to permanently stop the service, you can click on Startup type and select “Disabled” from the list of options from the drop-down menu.
- Now this service will be disabled until you enable it yourself using the same method. Restart your computer and check if disk/CPU usage returned back to normal.[4]
How to Disable agent.exe
Many users worry about agent.exe causing high disk and CPU usage, background processes etc. To disable the file, follow the following guide.
Following is the step by step guide on how to disable/remove it from the system:
Fix 1:
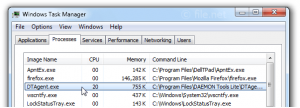
- Open the Task Manager and terminate the process. Hold down CTRL, ALT and DEL. Click the “Image Name” tab and find agent.exe. Click on it. Click “End Process” to terminate it. If there are more than one, terminate them all.
- Use the Windows search tool to locate the file. Click “Start” and “Search” then “All files or folders.” Select the option “Look in: My Computer” from the drop-down menu, or “Folder: My Computer”. Type “agent.exe” into the search box and click “Search.” When the search finishes, hover your mouse over the agent.exe file. Right click the file name and select “Delete.”
- Restart your computer by clicking “Start” and selecting “Shut down.” In the menu that appears, select “Restart” and click “Okay.” Your computer will restart and agent.exe will be gone.[5]
Fix 2:
- Open Programs and Features by clicking the Start button.
- Click Control Panel.
- Click Add or Remove Programs.
- Locate agent.exe-associated program (e.g. …
- Click on the InstallShield Update Service-associated entry.
- Click the Remove button on the right side.
Step by Step Guide to Resolve the agent.exe error
Many solutions/fixes are available which help resolve the errors caused by agent.exe.
Following are the most common fixes which are used to resolve this issue. Follow the guide to fix the issue.
Fix 1:
Step 1: Repair Registry Entries Associated with InstallShield Update Service
- Click the Start button.
- Type “command” in the search box… DO NOT hit ENTER yet!
- While holding CTRL-Shift on your keyboard, hit ENTER.
- You will be prompted with a permission dialog box.
- Click Yes.
- A black box will open with a blinking cursor.
- Type “regedit” and hit ENTER.
- In the Registry Editor, select the agent.exe-related key (e.g. InstallShield Update Service) you want to back up.
- From the File menu, choose Export.
- In the Save In list, select the folder where you want to save the InstallShield Update Service backup key.
- In the File Name box, type a name for your backup file, such as “InstallShield Update Service Backup”.
- In the Export Range box, be sure that “Selected branch” is selected.
- Click Save.
- The file is then saved with a .reg file extension.
- You now have a backup of your agent.exe-related registry entry.[3]
Step 2: Conduct a Full Malware Scan of Your PC
- Go to Windows defender.
- Start a full pc scan and wait for results.
Step 3: Clean Out Your System Junk (Temporary Files and Folders) With Disk Cleanup (cleanmgr)
- Click the Start button.
- Type “command” in the search box… DO NOT hit ENTER yet!
- While holding CTRL-Shift on your keyboard, hit ENTER.
- You will be prompted with a permission dialog box.[3]
- Click Yes.
- A black box will open with a blinking cursor.
- Type “cleanmgr” and hit ENTER.
- Disk Cleanup will begin calculating how much occupied disk space you can reclaim.
- The Disk Cleanup dialog box will appear with series of checkboxes you can select. In most cases, the “Temporary Files” category will occupy the most disk space.
- Check the boxes of the categories you want to clean and click OK.[3]
Step 4: Update Your PC Device Drivers
- Go to devices and drivers.
- Update the drivers.
Step 5: Utilize Windows System Restore to “Undo” Recent System Changes
- Click the Start button.
- In the search box, type “System Restore” and hit ENTER.
- In the results, click System Restore.
- Enter any administrator passwords (if prompted).
- Follow the steps in the Wizard to choose a restore point.
- Restore your computer.[3]
Step 6: Uninstall and Reinstall the InstallShield Update Service Program Associated with Agent.exe
- Hover the cursor in the bottom left of the screen to produce the Start Menu image.
- Right-Click to bring up the Start Context Menu.
- Click Programs and Features.
- Locate agent.exe-associated program (e.g. InstallShield Update Service) under the Name column.
- Click on the InstallShield Update Service-associated entry.
- Click the Uninstall/Change on the top menu ribbon.
- Follow the on-screen directions to complete the uninstallation of your agent.exe-associated program.[3]
Step 7: Run Windows System File Checker (“sfc /scannow”)
- Click the Start button.
- Type “command” in the search box… DO NOT hit ENTER yet!
- While holding CTRL-Shift on your keyboard, hit ENTER.
- You will be prompted with a permission dialog box.
- Click Yes.
- A black box will open with a blinking cursor.
- Type “sfc /scannow” and hit ENTER.
- System File Checker will begin scanning for agent.exe and other system file problems (be patient – the system scan may take a while).
- Follow the on-screen commands.[3]
Step 8: Install All Available Windows Updates
- Click the Start button.
- Type “update” into the search box and hit ENTER.
- The Windows Update dialog box will appear.
- If updates are available, click the Install Updates button.[3]
Step 9: Perform a Clean Installation of Windows
This step is your final option in trying to resolve your agent.exe issue.
Reinstalling Windows will erase everything from your hard drive, allowing you to start again with a fresh system.
Furthermore, a clean install of Windows will also quickly clean out any and all “junk” that has accumulated over the normal usage of your computer.[3]