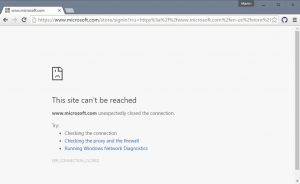
 Sometimes the Google Chrome browser can not load the site you’re looking for, and you receive the “This Site Can’t Be Reached.
Here are the steps to fix this site’s Chrome error on a Windows computer.
In most cases, the error of this site in the Chrome browser is due to a DNS lookup error.
This can happen if the service provider’s DNS server is busy, overloaded or has trouble.
You this site cannot be reached. A Chrome error can also be caused by browser extensions/add-ons, changes to Chrome settings, and other network problems.
So let’s move on and see the most effective ways to solve this problem on a Windows computer.
Table of Contents
10 Ways to Fix Chrome Error “This site can’t be reached.”
1. – Restart the DNS client service
 Restarting the DNS client is one of the most important steps to avoid resolving a Chrome error on this site. Perform the following steps to restart the DNS client service:
Step 1: Open the Run field by pressing the Windows + R keys together. In the Run field, type the following command and press Enter:
Step 2: In the Services list, go to the DNS client and select it when you find it. Now click Restart the service available on the left side of the window.
After restarting the DNS client service, make sure the site opens in Chrome if you do not want to try the next method.
2. Fix the Chrome error on this site if TCP / IP is unavailable
 Redefining TCP / IP is another pretty simple way to fix a site quickly. Could not access Chrome Error. To restore TCP / IP, follow these steps:
Step 1: Open a command line in Administrator mode. To do this, click the Start button on your computer and enter cmd in the Start Search box. A command line will appear. Right-click and select Run as Administrator. User Account Control asks you to continue the process then click Yes
Step 2: Run the commands listed below at the command prompt. Type the first “ipconfig / release” command and press Enter.
When you are finished, type the second ipconfig / all command, press Enter and continue until you run the last command. Here’s a list of commands to perform:
After running all of these commands, restart your computer and see if you have access to the necessary websites in Chrome. If not, try the following method.
# 3 – Change IPv4 DNS address
 The DNS IPv4 address is typically configured to automatically obtain the DNS server address or be set to the DNS server address provided by the provider.
In some cases, this could cause Chrome to display a Chrome error “Do not access this site.” You can try changing the address on the Google DNS server. This could solve your problem. How to Continue:
Step 1: Find the network icon, the icon that connects to Wi-Fi networks, on the right side of the taskbar.
When you find it, right-click on the network icon and select the half of the “Open Network and Shares” window. The “Network and Sharing Center” window will open.
Step 2. In the new window of “Show active networks,” select the current link that appears before the Connections parameter.
Step 3: Opens the Internet Connection Status window. Click the Properties button there.
Step 4. In the “Properties” window on the Networks tab, locate the TCP / IP 4 (TCP / IPv4) parameter and double-click if you find it.
Step 5: Here you can manually format the DNS address. Select Use the following DNS server address if it is not selected and type the following DNS public DNS address: 8.8.8.8.
8.8.4.4
Note: Make sure you select Scan on exit before pressing OK to apply the DNS settings.
Now go back to Chrome and check if it resolves a Chrome error on this site. If not, try the 4-hour method.
# 4 – Fixing an error correction before searching for DNS
 You can do it in your Chrome browser. To enable DNS pre-release, follow these steps:
Step 1: You’ll find 3 points on the right side of the address bar. Click to open the Chrome menu. On the Chrome menu, click Settings.
Step 2. On the settings page below, expand the “Advanced” option to access the advanced Chrome settings.
Go to privacy and select “Use forecast” to load pages faster. This allows you to search for DNS in Chrome and resolve the problem.
Note. If you can not find the preview service on the “Privacy” tab to quickly load pages, you will need to update Chrome to the latest version. For information about upgrading Chrome, see Method 10.
# 5 – Run Windows Network Diagnostics to Fix the Chrome Problem
The Network Diagnostic Detector detects problems with the network and tries to fix the problem if it is detected. To diagnose a network:
Step 1: Perform steps 1 and 2 as indicated in method 3.
Step 2: Click the Diagnostics button. This will solve the network.
After diagnosis, disconnect the Internet from your computer and reconnect, then try Chrome if the “This site is unavailable” error is unavailable.
# 6 – Disables the QUIC experimental protocol in Chrome
For this method, the marker called QUIC Experimental Protocol must be disabled to resolve the problem. Do the following:
Step 1: Type chrome: // flags / in the Chrome address bar and hit Enter.
Step 2: The options page appears. Press Ctrl + F to open the search window. Enter the experimental QUIC protocol there to find it. The value of this flag is set by default in the drop-down menu. Change the setting to Disabled, restart Chrome and check if it works.
# 7 – Change the maximum TLS version
Here’s another Chrome counter that needs to be modified to fix the “This page has not been reached” error in Chrome. Follow the procedure below to change the maximum value of the TLS version:
Step 1: Type chrome: // flags in the Chrome address bar and press Enter.
Step 2. Press Ctrl + F again to use the Chrome search tool. Type TLS to find the parameter for the maximum TLS version. Select TLS 1.3 from the drop-down menu instead of the default value.
Restart your Chrome browser and try uploading the site to see if that time is working.
# 8 – Update the network card driver to restore this site
The reason for this error could be an outdated network card driver. Updating the driver allows you to configure the settings. Follow these steps to update your network card driver:
Step 1: Press the Windows + X keys at the same time. The list opens. Click Device Manager in the list.
Step 2. In the device manager, find and expand the network card parameter. In the driver list, select the LAN or WLAN driver, depending on what you are using. Right-click and select Update driver.
Step 3: In the new window, click “Auto Search” to get the updated driver software. Your computer is looking for a newer version of the driver. Follow the instructions on the screen to update your network card driver.
If you say you have installed the latest driver, this driver has already been updated. Leave it that way.
At the end of the update process, restart your computer and make sure you receive the same error message that is not available on this site.
Try the next step if the problem persists.
# 9 – Reset Chrome Settings
Restoring default Chrome settings also resolves the problem. Try these steps to restore:
Step 1: Type chrome: // flags / in the Chrome address bar and hit Enter.
Step 2: At the top of the bookmarks page, find the default reset. Click to reset all Chrome settings.
# 10 – Reinstall Chrome
In extreme cases, you may need to reinstall Chrome on your computer. How to Continue:
Step 1. From the Start menu, enter “Apps and Items” to open the “Apps and Features” window with the installed software.
Step 2. Find Google Chrome in the list, click on it and click Delete.
Step 3. After removing Chrome, open the Chrome website and download the latest version of Chrome. Install it, and you can access the web pages.
If this Chrome error “This site cannot be reached,” happens, there is a good chance Chrome is not up to date. Always make sure the latest version of Chrome is installed on your computer to avoid this error.
See connection reset problem for chrome here.